
今回は無線LANカード付のマシンを初期設定していきます
主な違い
最初に結果だけ簡単に言うと
ath0というインターフェース名で無線LANが認識されているので
WAN,LAN,OPT1-4は有線ポート
OPT5にath0を指定するだけ
ちなみにath0はAtheros 9280と認識されている通り
AtherosのAR9280搭載カードで型番はWLE200NX
初回起動時
今回もこの段階ではまだLANケーブルを繋いでません
前回のエントリーで重複する内容は少し省略してます
最初はVLANの設定 今回もn
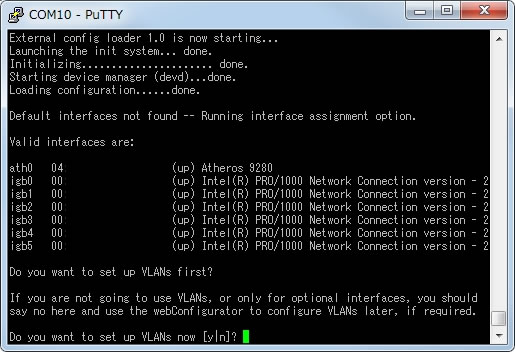
Default interfaces not found -- Running interface assignment option.

Valid interfaces are:

ath0   00:00:00:00:00:00   (up) Atheros 9280
igb0   00:00:00:00:00:00   (up) Intel(R) PRO/1000 Network Connection version - 2
igb1   00:00:00:00:00:00   (up) Intel(R) PRO/1000 Network Connection version - 2
igb2   00:00:00:00:00:00   (up) Intel(R) PRO/1000 Network Connection version - 2
igb3   00:00:00:00:00:00   (up) Intel(R) PRO/1000 Network Connection version - 2
igb4   00:00:00:00:00:00   (up) Intel(R) PRO/1000 Network Connection version - 2
igb5   00:00:00:00:00:00   (up) Intel(R) PRO/1000 Network Connection version - 2

Do you want to set up VLANs first?

If you are not going to use VLANs, or only for optional interfaces, you should
say no here and use the webConfigurator to configure VLANs later, if required.

Do you want to set up VLANs now [y|n]?
次はWANポートの指定
前の記事と同じく今回もigb0とigb1の配置は逆になっている
LANポートとインターフェース名
ETH0 : igb1
ETH1 : igb0
ETH2 : igb2
ETH3 : igb3
ETH4 : igb4
ETH5 : igb5
無線LAN : ath0
WANはigb1を設定
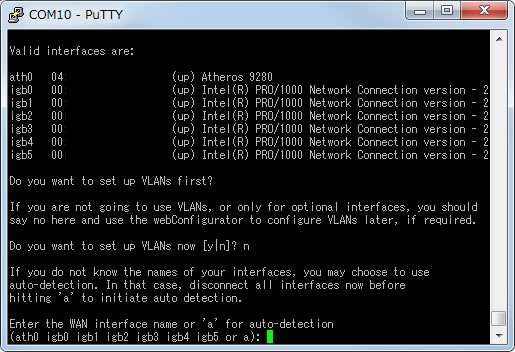
If you do not know the names of your interfaces, you may choose to use
auto-detection. In that case, disconnect all interfaces now before
hitting 'a' to initiate auto detection.

Enter the WAN interface name or 'a' for auto-detection
(ath0 igb0 igb1 igb2 igb3 igb4 igb5 or a):
次にLANポートをigb0に設定
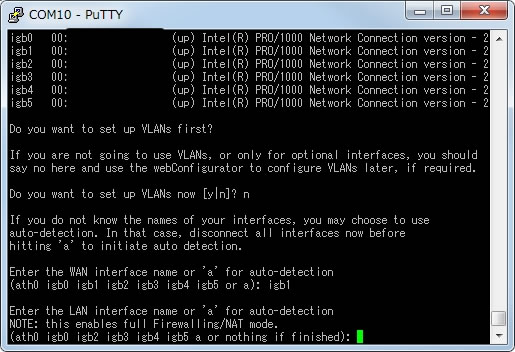
Enter the LAN interface name or 'a' for auto-detection
NOTE: this enables full Firewalling/NAT mode.
(ath0 igb0 igb2 igb3 igb4 igb5 a or nothing if finished):
次にOPT1をigb2に設定
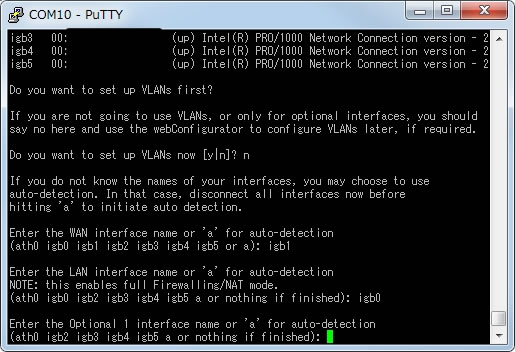
Enter the Optional 1 interface name or 'a' for auto-detection
(ath0 igb2 igb3 igb4 igb5 a or nothing if finished):
次にOPT2をigb3に設定
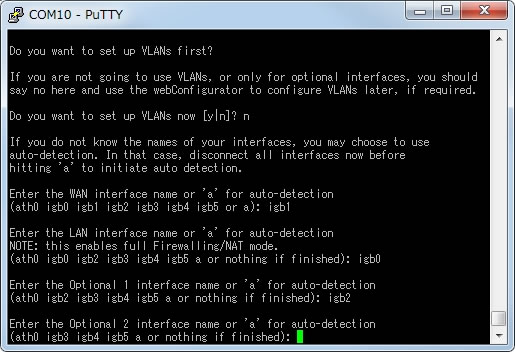
Enter the Optional 2 interface name or 'a' for auto-detection
(ath0 igb3 igb4 igb5 a or nothing if finished):
次にOPT3をigb4に設定
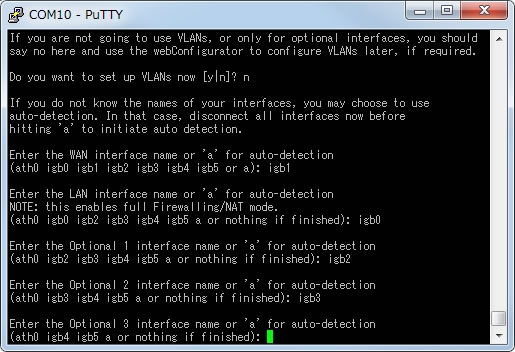
Enter the Optional 3 interface name or 'a' for auto-detection
(ath0 igb4 igb5 a or nothing if finished):
次にOPT4をigb5に設定
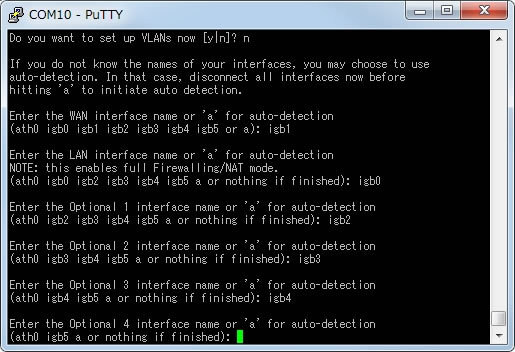
Enter the Optional 4 interface name or 'a' for auto-detection
(ath0 igb5 a or nothing if finished):
次にOPT5を聞かれる
有線ポートは全て指定したので後は残った無線LANのath0を設定
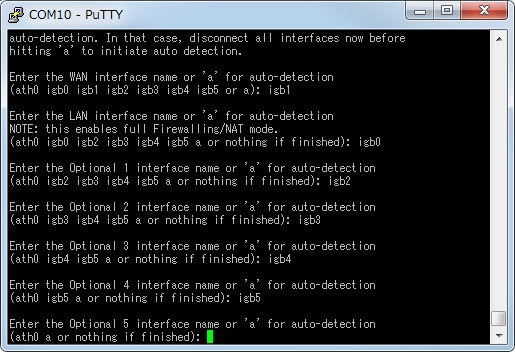
Enter the Optional 5 interface name or 'a' for auto-detection
(ath0 a or nothing if finished):
全てのインターフェースを指定したので空のままENTERキー
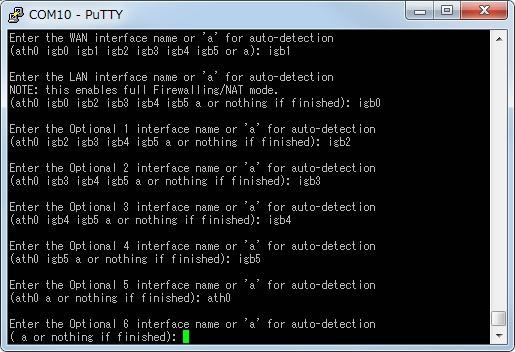
Enter the Optional 6 interface name or 'a' for auto-detection
( a or nothing if finished):
割り当ての確認をしてyで保存
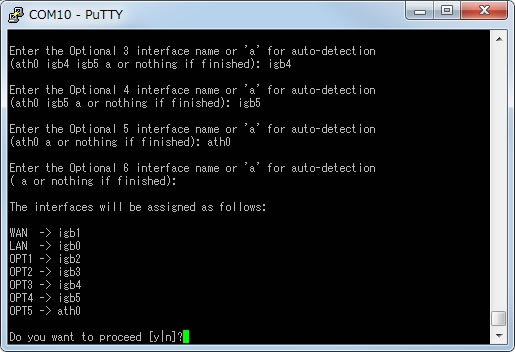
The interfaces will be assigned as follows:

WAN  -> igb1
LAN  -> igb0
OPT1 -> igb2
OPT2 -> igb3
OPT3 -> igb4
OPT4 -> igb5
OPT5 -> ath0

Do you want to proceed [y|n]?
起動処理が終われば初回起動時の設定は終了

Bootup complete


FreeBSD/amd64 (pfSense.localdomain) (ttyu1)


*** Welcome to pfSense 2.2.6-RELEASE-pfSense (amd64) on pfSense ***

 WAN (wan)       -> igb1       ->
 LAN (lan)       -> igb0       -> v4: 192.168.1.1/24
 OPT1 (opt1)     -> igb2       ->
 OPT2 (opt2)     -> igb3       ->
 OPT3 (opt3)     -> igb4       ->
 OPT4 (opt4)     -> igb5       ->
 OPT5 (opt5)     -> ath0_wlan0 ->
 0) Logout (SSH only)                  9) pfTop
 1) Assign Interfaces                 10) Filter Logs
 2) Set interface(s) IP address       11) Restart webConfigurator
 3) Reset webConfigurator password    12) pfSense Developer Shell
 4) Reset to factory defaults         13) Upgrade from console
 5) Reboot system                     14) Enable Secure Shell (sshd)
 6) Halt system                       15) Restore recent configuration
 7) Ping host                         16) Restart PHP-FPM
 8) Shell


Enter an option:
後はETH1へLANケーブルを繋ぎクライアントPCからWEBGUIへログインして設定

コメント